 Slide 12
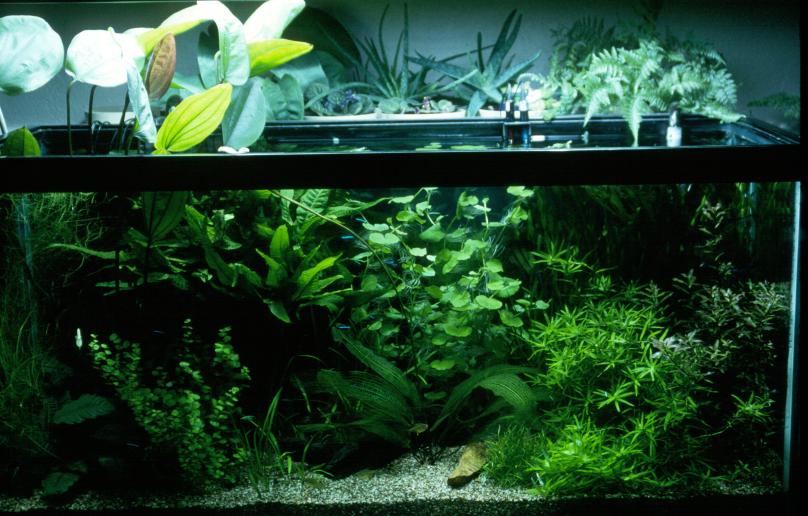
OK, what does it take to make the aquariums shown in the previous slides work? Plants have
specific requirements
Slide 12
OK, what does it take to make the aquariums shown in the previous slides work? Plants have
specific requirements
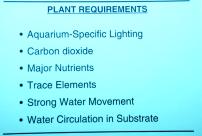
- The correct intensity and spectrum of lighting
- Dissolved carbon dioxide to satisfy the need for carbon
- Major nutrients such as nitrogen, phosphorus, potassium, sulfur and others
- Trace elements such as iron, boron, and others
- Strong water movement to bring nutrients to the plants and carry waste away
- Water circulation in the substrate to bring nutrients to the roots
Lighting
 Slide 13
There are many terms associated with lighting. Some are useful to us and some are not.
Slide 13
There are many terms associated with lighting. Some are useful to us and some are not.
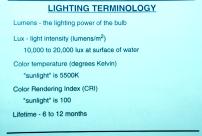
All bulbs are rated in terms of watts. This is simply the power the bulb consumes and only roughly translates to brightness since some bulbs are more efficient or use better phosphors. Since all bulbs have a watts rating, you typically see rules of thumb such as "3 watts per gallon" for a planted tank. This is a starting point but is not very accurate since a lot depends on the type of bulb.
Lumens are a better measure of the brightness of a bulb. More lumens means a brighter bulb. However, lumens are used to describe how your eyes see the brightness, NOT how the plants see it. A bulb with lots of green in the spectrum will have a high lumen value but wonĺt help your plants much. Also, lumens is the total output from the bulb; it doesn't say how much gets to your plants. That's a function of how well your reflector works.
Lux is a measure of light intensity. One lux = one lumen per square meter. This shows how much light is actually getting to a specific plant. Naturally, a bulb canĺt be specified in lux because it depends on the reflector, distance from the bulb, shadows and all kinds of other effects. But if you had a lux meter and you knew how many lux a plant needed, you could determine if you needed more or better bulbs. As a side note, lux is also based on how a human sees the intensity, not a plant. But it's a good relative measure.
Color temperature in degrees Kelvin (K) describes the overall spectrum of the bulb. It refers to the color a "radiating black body" would be if heated to that temperature. A lower temperature is a redder color (incandescent light is about 2700K) and higher temperature is bluer. Daylight is around 5500K. Plants do well and look best in temperature ranges between 5000K and 7000K.
Color Rendering Index (CRI) describes how well a source renders colors to the human eye compared to sunlight. 100 (%) is perfect. Any bulb over 90 is adequate for our purposes and will make the plants look close to natural.
Fluorescent bulbs are usually rated for how long they last, 10000 hours to 30000 hours. This depends on the number of starts, temperature, etc. Bulbs lose intensity over time and should be changed before they burn out. Six months to one year is a good target for replacement. Try to stagger replacement times so that all the bulbs arenĺt changed at once.
 Slide 14
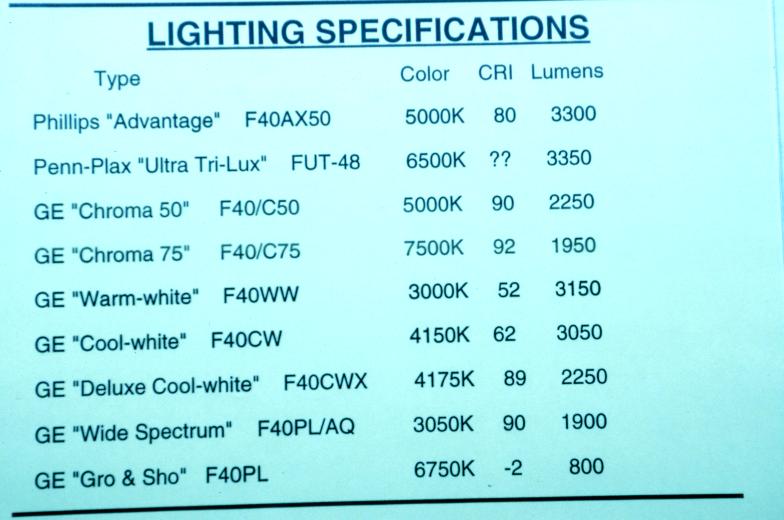
Here are some specs for some typical bulbs. These are all 40w bulbs but notice the difference
in lumens and CRI, especially the GE "Gro&Sho" plant bulb. We like the Penn-Plax Ultra
Tri-Lux - very bright and good color rendition. It works great in combination with Triton
bulbs.
Slide 14
Here are some specs for some typical bulbs. These are all 40w bulbs but notice the difference
in lumens and CRI, especially the GE "Gro&Sho" plant bulb. We like the Penn-Plax Ultra
Tri-Lux - very bright and good color rendition. It works great in combination with Triton
bulbs.
 Slide 15
Now that we have some background, let's talk about plant needs.
Slide 15
Now that we have some background, let's talk about plant needs.
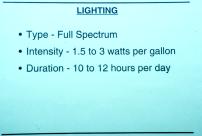
To meet general lighting requirements, we recommend
- Full spectrum lighting
- 1.5 to 3 watts per gallon
- 10 to 12 hours per day
 Slide 16
"Full Spectrum" usually means tri-phosphor bulbs (three different phosphors instead of the
usual two).
Slide 16
"Full Spectrum" usually means tri-phosphor bulbs (three different phosphors instead of the
usual two).
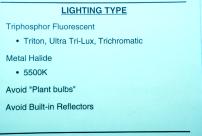
Tri-phosphor fluorescent lighting is usually the brightest per watt and provides good color (example: Tritons, PennPlax Ultra Tri-Lux, Coralife Trichromatic)
- For metal halide, use 5500K (4300K is cheaper but very yellow)
- Avoid houseplant bulbs (too purple or pinkish)
- Avoid built-in reflectors on bulbs - almost anything else works better. For example, white paint, aluminum foil or silver mylar in the hood will direct much more light to the water than will an internal reflector.
 Slide 17
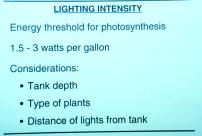
Photosynthesis requires a certain energy threshold - just any old light may not do it.
Beyond a certain brightness, light is wasted.
1.5 to 3 watts per gallon is a good start. Use lower w/g if you use better bulbs. We
have 160 watts (2 Tri-Lux,2 Triton) on 100 gallon tanks (1.6 w/g).
Use more watts if:
Slide 17
Photosynthesis requires a certain energy threshold - just any old light may not do it.
Beyond a certain brightness, light is wasted.
1.5 to 3 watts per gallon is a good start. Use lower w/g if you use better bulbs. We
have 160 watts (2 Tri-Lux,2 Triton) on 100 gallon tanks (1.6 w/g).
Use more watts if:
- you are using lower lumens/watt bulbs (cool white, etc)
- the tank is deeper than 20"
- many tall plants shade lower plants
- the bulbs are suspended above the tank more than 4-6"
 Slide 18
This tank is a 24" high 90 gallon tank and has a metal halide hood suspended over it. The
two 175W bulbs themselves are 14" from the water surface. So even though it's almost "4
watts per gallon", the surface intensity is the same as a tank with 4 40w fluorescent
bulbs 4" from the water (15000 lux).
Light varies with distance from the bulb:
Slide 18
This tank is a 24" high 90 gallon tank and has a metal halide hood suspended over it. The
two 175W bulbs themselves are 14" from the water surface. So even though it's almost "4
watts per gallon", the surface intensity is the same as a tank with 4 40w fluorescent
bulbs 4" from the water (15000 lux).
Light varies with distance from the bulb:
- Fluorescent - 1/distance (Linear source, proportional drop off)
- Metal halide - 1/distance squared (Point source, Inverse Square Law)
 Slide 19
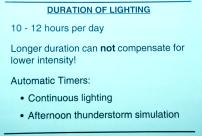
The duration or photoperiod is important. If itĺs too short, the plants won't photosynthesize
long enough and won't have optimum growth. If it's too long, the plants will stop
photosynthesizing naturally ("go to sleep") and the light is only being used by algae.
A longer period can not make up for inadequate intensity.
Slide 19
The duration or photoperiod is important. If itĺs too short, the plants won't photosynthesize
long enough and won't have optimum growth. If it's too long, the plants will stop
photosynthesizing naturally ("go to sleep") and the light is only being used by algae.
A longer period can not make up for inadequate intensity.
You should use timers to regulate the period. We've tried having a dark period in the afternoon based on the theory that afternoon thunderstorms were common in the tropics and the interruption in light slowed algae growth. It didnĺt affect algae and killed off some light-loving plants.
Water Chemistry
 Slide 20
Many aquarists are intimidated by water chemistry. In reality, there is nothing to be afraid
of - all you need to know to be successful with plants is some simple hardness terms and
how pH and CO2 are related.
Slide 20
Many aquarists are intimidated by water chemistry. In reality, there is nothing to be afraid
of - all you need to know to be successful with plants is some simple hardness terms and
how pH and CO2 are related.
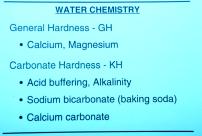
Although there are many varied, interrelated and confusing terms for water hardness, only two are useful to us and are easily measured. Both types of hardness can be expressed in German degrees (dH) or in parts per million (ppm) or milligrams per liter (mg/l). The terms ppm and mg/l are the same; 1 dH = 17.9 ppm = 17.9 mg/l.
Most hardness kits return values as "Calcium Carbonate (CaCO3) equivalents". This simply means "the same amount of hardness as would be produced by that much CaCO3" no matter what the actual source of the hardness. This tends to confuse many people. Don't worry about it - just concentrate on the measured values.
General Hardness or "GH" in German terms is the amount of calcium and magnesium in the water, nothing more, nothing less. When a fish or plant is said to prefer hard water, it is GH that is the critical parameter. GH is easily measured with the Tetra GH Hardness test kit. Be wary of test kits that measure "total hardness" or other terms - make sure they are measuring calcium (Ca) and magnesium (Mg) only.
Carbonate Hardness or "KH" is the amount of bicarbonate (HCO3-) or carbonate (CO3--) ions in the water. The Tetra KH Hardness test kit will measure carbonate hardness but there is a caveat. There is a more general term called "alkalinity" that refers to the amount of acid buffering in the water (how well the water can resist a change in pH as acid is added). Donĺt confuse alkalinity with "alkaline water" - they are not the same. Anyway, carbonate hardness is one component of alkalinity. Another common source of alkalinity is phosphate - if you use pH-UP or pH-DOWN, you are adding alkalinity to the water (to resist pH changes) but you are not increasing KH. To put it another way, which is important to us, if carbonates are the only buffer in your water, alkalinity and carbonate hardness are the same thing!
Why is this important? Because carbonate hardness can not be measured directly! The Tetra KH test kit is actually an alkalinity test kit that assumes carbonates are the only buffer in the water. If other buffers are present, the KH reading will be falsely high. How do you know if other buffers are present? You generally donĺt unless you have a phosphate test kit or you start with water of very low KH and add your own in the form of sodium bicarbonate (plain old baking soda).
People get GH and KH mixed up a lot. Although "hard" water is usually high in both GH and KH, they are really independent. They are commonly seen together because naturally hard water usually comes from areas with limestone in the aquifer. Limestone is calcium carbonate (CaCO3), which will add both GH (in the form of calcium) and KH (in the form of carbonate) to the water.
So, what does all this mean? Simple! Decide on a GH value that is suitable for your fish and plants. A good general value for a planted community tank is 5 dGH or about 100 ppm. If you have soft water, add some calcium carbonate and a little Epsom salts (magnesium sulfate, MgSO4) to increase the GH. If you have hard water, mix your tap water with distilled or Reverse Osmosis (RO) water to soften it.
 Slide 21
Carbonate hardness is a little more complicated. You need some KH (actually, alkalinity)
to prevent pH swings or crashes as acid is added to the water through nitrification. As
you add KH, the pH will increase in proportion. If you aren't using CO2 injection, 2-3 dKH
will give you good buffering and will produce a pH of about 7.3 or so depending on your tap
water.
Slide 21
Carbonate hardness is a little more complicated. You need some KH (actually, alkalinity)
to prevent pH swings or crashes as acid is added to the water through nitrification. As
you add KH, the pH will increase in proportion. If you aren't using CO2 injection, 2-3 dKH
will give you good buffering and will produce a pH of about 7.3 or so depending on your tap
water.
If you do use CO2 injection, KH plays an important role. Just as adding KH increases pH, adding CO2 lowers pH. There is a well defined relationship between KH, CO2 and pH (I'll get to that next). Anyway, CO2 injection is key to good plant growth so we have an ideal situation - a good KH level provides a stable pH and the CO2 injection allows us to set a specific pH.
 Slide 22
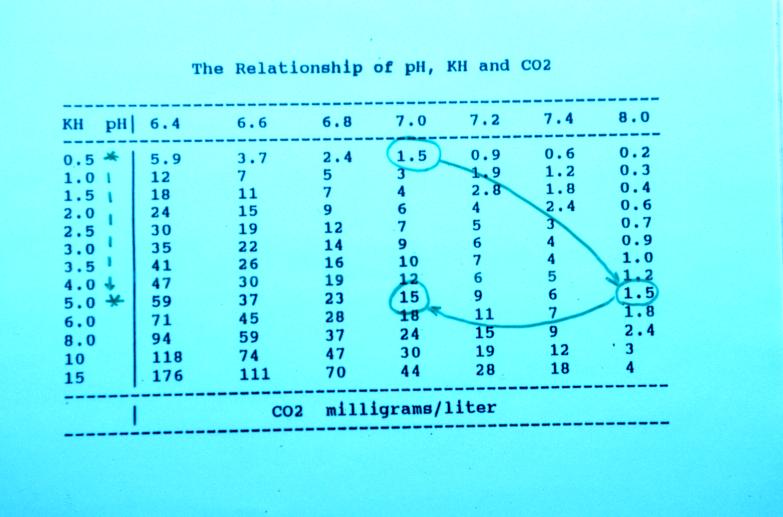
This chart shows how KH, CO2 and pH are related. An important note: this chart is only true
if carbonates are the only buffer in the water. If phosphates or other buffers are
present, this chart is useless!
Slide 22
This chart shows how KH, CO2 and pH are related. An important note: this chart is only true
if carbonates are the only buffer in the water. If phosphates or other buffers are
present, this chart is useless!
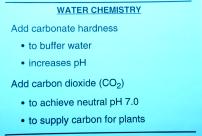
Letĺs take an example here. Suppose your tap water has 0.5 dKH and 1.5 mg/l of dissolved CO2 (a very typical case). In this case, your pH will be 7.0 (if bicarbonates are the only buffer present!). Now if we add enough sodium bicarbonate to get to 5 dKH (for good buffering), the pH will increase to 8.0. But, if we inject enough CO2 to give us 15 mg/l (for good plant growth), the CO2 will bring the pH back down to 7.0. The CO2 and KH balance each other and we have:
- a neutral pH which is suitable for almost all fish and plants
- good buffering to resist pH changes, giving a stable environment
- good dissolved CO2 for great plant growth
 Slide 23
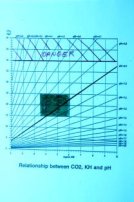
I prefer this chart to the table in the last slide - it's easier to read. This shows that
too much CO2 can be dangerous (>40 ppm) and shows the desired range of pH, CO2 and KH
in the green area.
Slide 23
I prefer this chart to the table in the last slide - it's easier to read. This shows that
too much CO2 can be dangerous (>40 ppm) and shows the desired range of pH, CO2 and KH
in the green area.
By adjusting the KH and amount of CO2 in the water, you can pick any pH you want (within reason). However, you can NOT set CO2 levels or KH levels by trying to change pH. Anything you do to change pH (other than changing KH or CO2) will either be temporary (like foolishly adding acid) or will negate the chart (like adding phosphate buffers).
 Slide 24
I said water chemistry is simple - here are the only tools and supplies you need to adjust
water hardness. The Tetra hardness test kits are shown on the left. They are cheap and
simple to use.
Slide 24
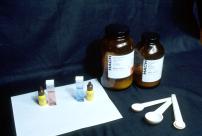
I said water chemistry is simple - here are the only tools and supplies you need to adjust
water hardness. The Tetra hardness test kits are shown on the left. They are cheap and
simple to use.
We use chemicals from a chemical supply house for calcium carbonate and sodium bicarbonate. You can find this in other places. Baking soda can be bought at a grocery stores and calcium carbonate can be found in home brewing or wine-making stores.
 Slide 25
Carbon dioxide is a little more complicated. There is some info in the handout for a simple
do-it-yourself (DIY) yeast CO2 generator to experiment with before jumping into CO2 with both
feet.
Slide 25
Carbon dioxide is a little more complicated. There is some info in the handout for a simple
do-it-yourself (DIY) yeast CO2 generator to experiment with before jumping into CO2 with both
feet.
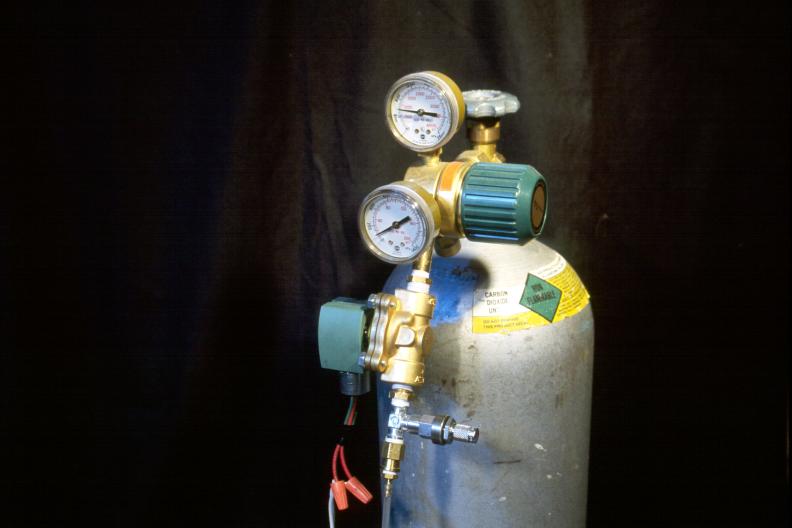
When you do jump, a proper setup with a compressed gas bottle, regulator, gauges, solenoid and valves can run from $150 to $200.
 Slide 26
This shows "CO2 in action". The CO2 bottle feeds gas through a regulator, solenoid valve and
fine adjustment valve, into a "bubble counter" so you can see the flow (bubbles per second)
and into a CO2 reactor in a trickle filter sump. A pH controller (not shown) turns the CO2
on and off to maintain a specific pH of 7.0 +/- 0.05.
Slide 26
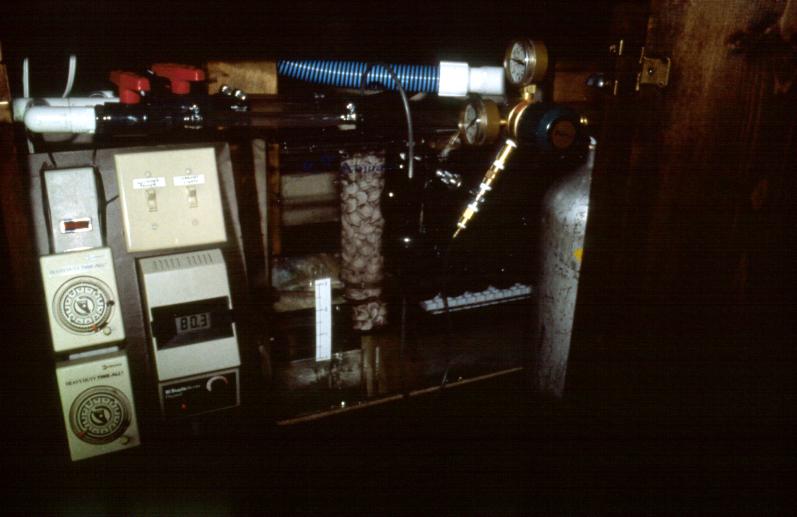
This shows "CO2 in action". The CO2 bottle feeds gas through a regulator, solenoid valve and
fine adjustment valve, into a "bubble counter" so you can see the flow (bubbles per second)
and into a CO2 reactor in a trickle filter sump. A pH controller (not shown) turns the CO2
on and off to maintain a specific pH of 7.0 +/- 0.05.
This is an example of the high tech side of aquascaping. Most setups are much simpler.
Plant Nutrients
 Slide 27
To grow, plants need the right "food" and "vitamins" just like we do. The basic building
blocks are materials the plant needs to build tissue - things like hydrogen, oxygen and
carbon. These can be thought of as "meat and potatoes" for plants. They are supplied by
water (H2O) and carbon dioxide (CO2).
Slide 27
To grow, plants need the right "food" and "vitamins" just like we do. The basic building
blocks are materials the plant needs to build tissue - things like hydrogen, oxygen and
carbon. These can be thought of as "meat and potatoes" for plants. They are supplied by
water (H2O) and carbon dioxide (CO2).
Major nutrients are also required but in smaller amounts. Sort of like "peas and carrots" for plants. These include nitrogen, phosphorus, potassium, calcium, magnesium and sulfur. Most of these are supplied naturally in an aquarium, either from fish waste or from our attempts at "water chemistry". As a matter of fact, it is sometimes a major effort to limit things like N and P (but keep in mind, "zero" is not a good goal!).
The final things are trace elements, which are like vitamins. You can do OK without supplements but the old "One-A-Day" regimen keeps you healthy and strong. Trace elements are usually supplied via commercial fertilizers like Duplaplant tablets and drops and other commercial products.
 Slide 28
We have been using the Dupla products since 1987 and have had great success with them. They
cost a lot to buy but they are very concentrated - on a "per dose" basis, they cost about the
same as other products.
Slide 28
We have been using the Dupla products since 1987 and have had great success with them. They
cost a lot to buy but they are very concentrated - on a "per dose" basis, they cost about the
same as other products.
Shown are Duplaplant tablets (added at water changes based on the amount of new water) and Duplaplant-24 daily drops containing supplemental iron. Extra iron is needed daily since it rapidly oxidizes in the water - plants can utilize iron in the Fe++ (ferrous) state but cannot use it in the oxidized Fe+++ (ferric) state.
Also shown are Duplarit-K laterite balls. These are made from baked iron rich clay and can be inserted in the substrate near the roots of plants which are heavy feeders - things like Echinodorus sword plants.
 Slide 29
Duplaplant-24 drops are added daily in the morning when we check the tanks and top off the
water. It comes in a convenient dropper bottle. We use 4-6 drops in a 90 gallon tank but
that will vary with the types and amount of plants. You should monitor iron with a high
quality iron test kit and strive to get about 0.1 mg/l of iron in the water.
Slide 29
Duplaplant-24 drops are added daily in the morning when we check the tanks and top off the
water. It comes in a convenient dropper bottle. We use 4-6 drops in a 90 gallon tank but
that will vary with the types and amount of plants. You should monitor iron with a high
quality iron test kit and strive to get about 0.1 mg/l of iron in the water.
Environment
 Slide 30
A planted aquarium is a bit more complicated to run than a fish-only tank since the plants
must depend on the environment to supply all their needs. They can't wander around looking
for leftover food or go up to the surface to gasp for air if things aren't going well.
Slide 30
A planted aquarium is a bit more complicated to run than a fish-only tank since the plants
must depend on the environment to supply all their needs. They can't wander around looking
for leftover food or go up to the surface to gasp for air if things aren't going well.
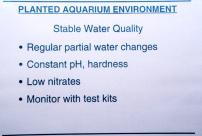
One important part of the environment is stable water quality. Some plants, like the \ Cryptocorynes, can actually "melt down" if the water quality or other parameters are unstable. Our methods to ensure stable water quality are:
 Slide 31
Another important part of the environment is the substrate. Plants use the substrate as an
anchor and as a source of food. Obviously, any old gravel that is not too coarse will anchor
the plants but supply nutrients is a different story. Some important considerations for a
substrate are:
Slide 31
Another important part of the environment is the substrate. Plants use the substrate as an
anchor and as a source of food. Obviously, any old gravel that is not too coarse will anchor
the plants but supply nutrients is a different story. Some important considerations for a
substrate are:
- a grain size of 2-3 mm (1/16" to 1/18")
- non-reactive - quartz is preferred over limestone
- it should be at or above water temperature
- there should be a means to move water through the substrate
- there should be some form of additive like laterite in the substrate to support the plant's need for nutrients
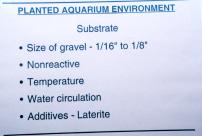
 Slide 32
We like to use a quartz sandblasting gravel known as Tex-Blast (I think it is also available
as pool filter gravel). It's a nice light brown color and has the right grain size. It's
shown here with a Barclaya longifolia and some Malaysian Trumpet Snails.
Slide 32
We like to use a quartz sandblasting gravel known as Tex-Blast (I think it is also available
as pool filter gravel). It's a nice light brown color and has the right grain size. It's
shown here with a Barclaya longifolia and some Malaysian Trumpet Snails.
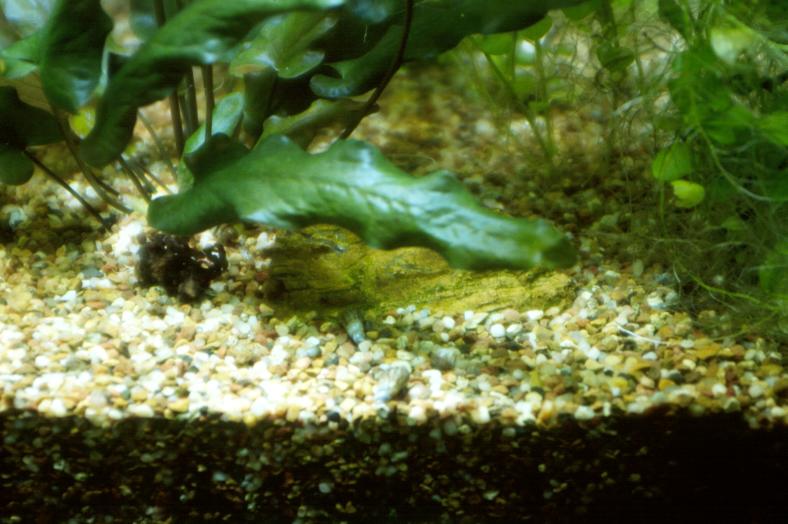
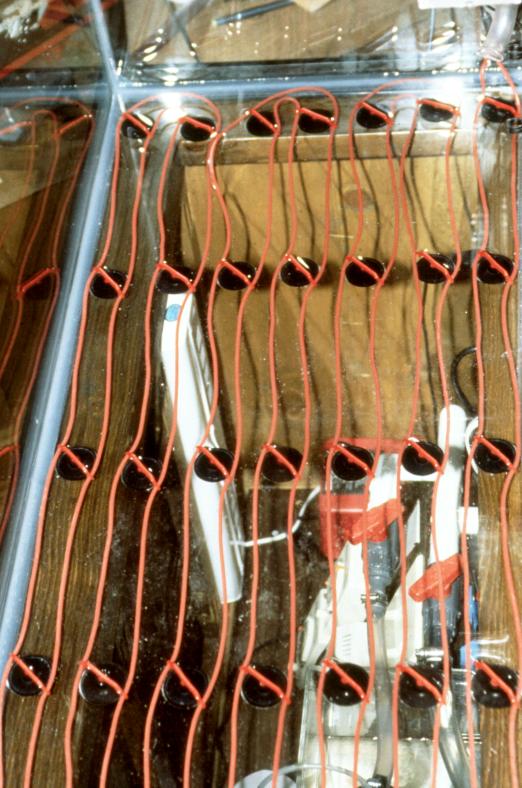 Slide 33
To add warmth to the substrate and to provide water movement via convection currents, we use
Dupla substrate heating coils. These go on the bottom of the tank under the gravel and provide
a concentrated heat source. This causes the water around them to heat up and rise, allowing
cooler water to move down to the bottom.
Slide 33
To add warmth to the substrate and to provide water movement via convection currents, we use
Dupla substrate heating coils. These go on the bottom of the tank under the gravel and provide
a concentrated heat source. This causes the water around them to heat up and rise, allowing
cooler water to move down to the bottom.
This photo shows a 250 watt coil on the bottom of a 90 gallon tank. This is really too much for the tank (150 watts would be better) but we didn't know that when we bought them. The tank was a glass, open-top discus tank to be kept at 84 F and we thought we needed more wattage due to these factors. However, the important factor is the length of the cable - more wattage means a longer cable. We had to cram this one in with tighter than normal spacing! It still works fine, though.
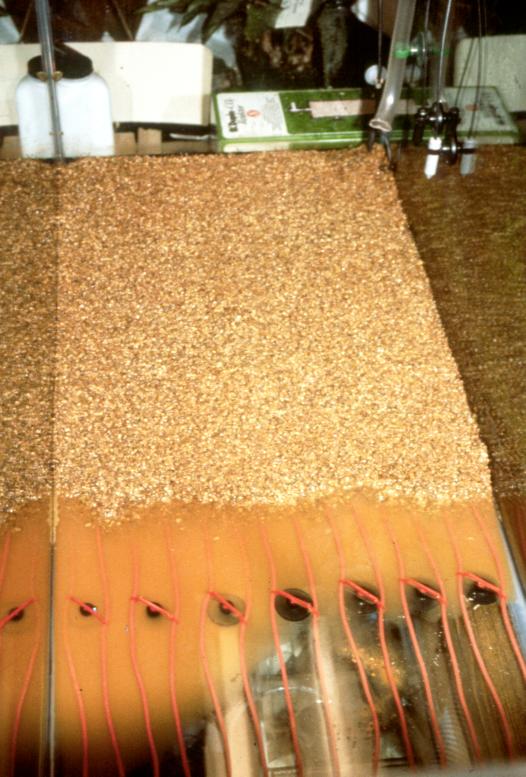 Slide 34
We mix Duplarit-G laterite in the lower 1/3 of the gravel (1 kilogram or 2.2 pounds for a
100 gallon tank). This provides a source of iron initially and the clay will act to capture
and hold nutrients brought down via the convection currents. The laterite is only
added to the lower 1/3 so that the other 2/3 will seal it in and prevent the tank water from
turning red.
Slide 34
We mix Duplarit-G laterite in the lower 1/3 of the gravel (1 kilogram or 2.2 pounds for a
100 gallon tank). This provides a source of iron initially and the clay will act to capture
and hold nutrients brought down via the convection currents. The laterite is only
added to the lower 1/3 so that the other 2/3 will seal it in and prevent the tank water from
turning red.
 Slide 35
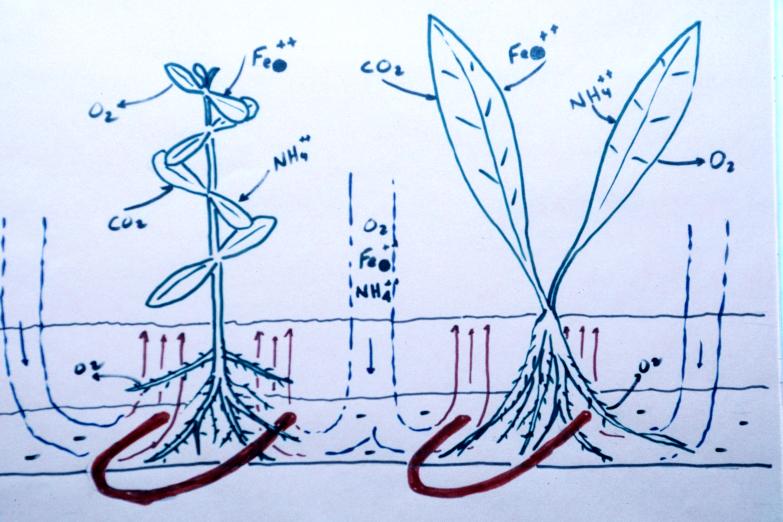
Here is a drawing of the heating coils, substrate and nutrients in action. Plants are able to
adsorb iron, ammonium, CO2 and trace elements through their leaves and roots. They also
respire O2 when they are photosynthesizing. The heating coils in the substrate generate
warm and cool zones, creating convection currents and bringing the water-borne nutrients
into the substrate. The clay in the laterite has negative binding sites which hold the
positively charged nutrients ions (Fe++, NH4+) until plant roots can adsorb them. The water
brought into the substrate also brings oxygen, keeping the substrate from going anaerobic.
Slide 35
Here is a drawing of the heating coils, substrate and nutrients in action. Plants are able to
adsorb iron, ammonium, CO2 and trace elements through their leaves and roots. They also
respire O2 when they are photosynthesizing. The heating coils in the substrate generate
warm and cool zones, creating convection currents and bringing the water-borne nutrients
into the substrate. The clay in the laterite has negative binding sites which hold the
positively charged nutrients ions (Fe++, NH4+) until plant roots can adsorb them. The water
brought into the substrate also brings oxygen, keeping the substrate from going anaerobic.
 Slide 36
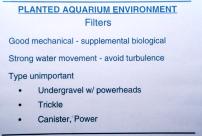
Another factor in the environment is filtration. What is needed is really only mechanical
filtration and good water movement - the plants themselves act as biological and chemical
filters. However, with a high fish load, a little supplemental biological filtration is a
good safety factor.
Slide 36
Another factor in the environment is filtration. What is needed is really only mechanical
filtration and good water movement - the plants themselves act as biological and chemical
filters. However, with a high fish load, a little supplemental biological filtration is a
good safety factor.
The filter should create a strong water movement (but not an underwater hurricane!) but without too much surface turbulence which will drive off CO2.
The type of filter is not important but we prefer trickle filters for their convenience. The sump is a nice place to hide CO2 reactors and heaters, they provide a good surface skimming action to remove protein or bacterial films and the usually have a strong pump to provide good water flow.
 Slide 37
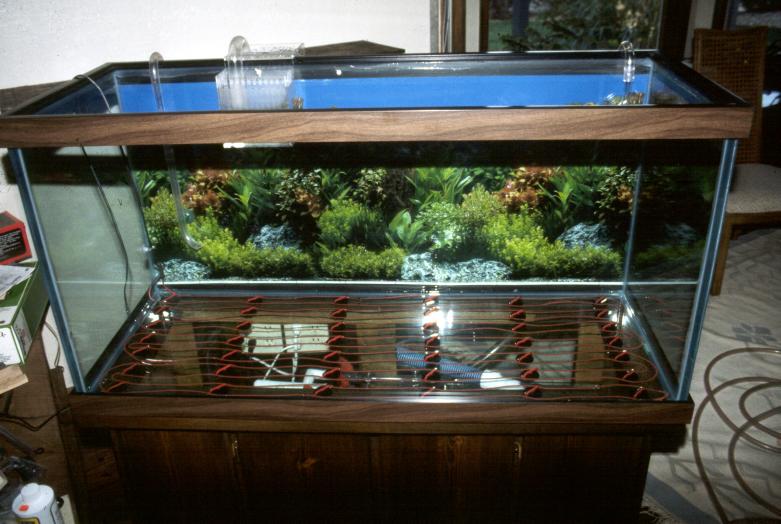
This photo shows our 90 gallon setup with a trickle filter. The skimmer box is to the left
and there are two water return lines in the right and left corners. The left return exits
lower in the tank and points to the center front while the right return is toward the
surface and also points to the center front. This high/low scheme provides a nice circular
movement.
Slide 37
This photo shows our 90 gallon setup with a trickle filter. The skimmer box is to the left
and there are two water return lines in the right and left corners. The left return exits
lower in the tank and points to the center front while the right return is toward the
surface and also points to the center front. This high/low scheme provides a nice circular
movement.
 Slide 38
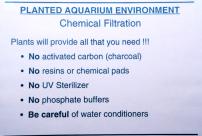
What about the ever-popular chemical filtration products that seem to take up half the shelf
space in a typical fish shop? Fuhgettaboutit! Plants will provide all the chemical
filtration you need and, more than likely, the chemical filtration products will just
wreak havoc with your water chemistry and fertilizers! A good planted tank has:
Slide 38
What about the ever-popular chemical filtration products that seem to take up half the shelf
space in a typical fish shop? Fuhgettaboutit! Plants will provide all the chemical
filtration you need and, more than likely, the chemical filtration products will just
wreak havoc with your water chemistry and fertilizers! A good planted tank has:
- No activated carbon (charcoal) - it will remove trace elements!
- No resins or chemical pads - they also remove trace elements
- No UV sterilizers - they oxidize iron
- No phosphate buffers - they will cause algae
- Be careful of water conditioners - some will remove heavy metals (AKA trace elements!)
 Slide 39
And the final factor in the environment is the fish population. Choose your specimen fish
carefully and be sure to include a variety of "housekeepers".
Slide 39
And the final factor in the environment is the fish population. Choose your specimen fish
carefully and be sure to include a variety of "housekeepers".
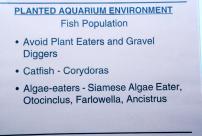
Avoid plant eaters (herbivores) and gravel diggers - you don't need help in arranging the aquascaping!
Select some catfish like corydoras to clean up uneaten food.
Provide a variety of algae eaters - different types will eat different forms of algae. Good choices are "Siamese Algae Eaters", Otocinclus, Farlowella and Ancistrus. Avoid "Flying Foxes" and "Chinese Algae Eaters" - they become aggressive when they are adults.
 Slide 40
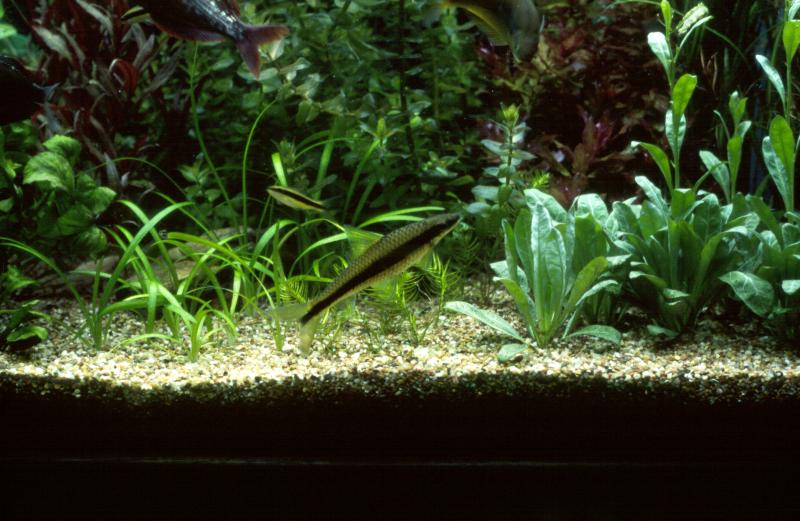
Siamese Algae Eaters (Crossocheilus siamensis), sometimes called "Siamese Flying Foxes",
are often difficult to find. Most times you have to mail order them. They are a lighter color
than normal flying foxes and have a rough-edged black stripe. Flying Foxes have a very
sharp-edged black stripe with a thinner bronze stripe just above it. In the stores, SAE are
usually 1-2" long. This plump adult is about 6" long. A juvenile is right behind it. The SAE
are the only fish known to eat the "Black Beard Algae" that is common on slow growing plants
like Anubias. SAEs are invaluable in a planted tank.
Slide 40
Siamese Algae Eaters (Crossocheilus siamensis), sometimes called "Siamese Flying Foxes",
are often difficult to find. Most times you have to mail order them. They are a lighter color
than normal flying foxes and have a rough-edged black stripe. Flying Foxes have a very
sharp-edged black stripe with a thinner bronze stripe just above it. In the stores, SAE are
usually 1-2" long. This plump adult is about 6" long. A juvenile is right behind it. The SAE
are the only fish known to eat the "Black Beard Algae" that is common on slow growing plants
like Anubias. SAEs are invaluable in a planted tank.
 Slide 41
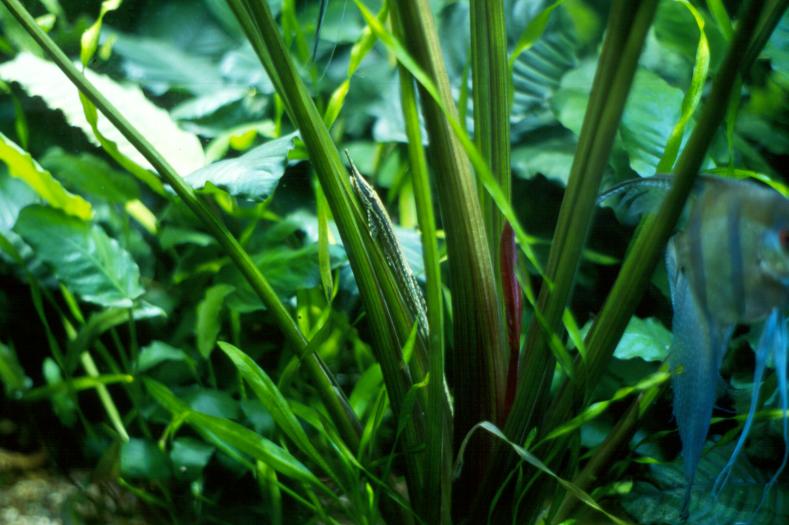
This is a Farlowella acus on a swordplant stem. They have a reputation as being
difficult fish but we have never had problems with them. We have some that are 3 or 4
years old. Maybe the "problem" has simply been a lack of algae in their diet!
Slide 41
This is a Farlowella acus on a swordplant stem. They have a reputation as being
difficult fish but we have never had problems with them. We have some that are 3 or 4
years old. Maybe the "problem" has simply been a lack of algae in their diet!
Maintenance
 Slide 42
Finally, a word about maintenance. DO IT! Ok, two words. A planted tank needs more
maintenance than a fish-only tank to keep it looking good and to keep it healthy. Some
things to consider:
Slide 42
Finally, a word about maintenance. DO IT! Ok, two words. A planted tank needs more
maintenance than a fish-only tank to keep it looking good and to keep it healthy. Some
things to consider:
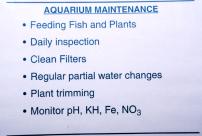
Feeding the fish and plants. Feeding the fish is usually obvious, but people sometimes forget that plants eat, too. With the Duplaplant-24 daily drops, it's easy to make a habit out of it.
Daily inspections are important. You set up a plant tank for it's attractiveness so look at it daily. You may notice that algae is cropping up or the plants may look yellow - both are signs that the iron level s may not be right. Your plants will tell you when something is not right - pay attention to them.
Keep the filters clean. Another obvious thing but it is easily overlooked since the filters are generally hidden from view. If you let the filters go too long, they will become nitrate generators as all the captured crud decomposes.
We can not stress enough the importance of regular, partial water changes. 25% to 50% every two weeks is a good idea. Remember, even though the plants are pretty good filters, they generate waste as well and changing water is the only way to remove these waste products as well as keeping nitrates under control. This is also a good time to trim plants and check water chemistry.
Plants grow and they grow fast if you treat them right. It is not unusual to have to trim fast growing plants every two weeks. A nicely arranged aquascape doesnĺt stay nice very long - the plants donĺt seem to care that they are messing up your carefully designed underwater garden.
And donĺt forget to monitor the major factors - pH, carbonate hardness, iron and nitrates. After you have some experience, you can easily tell when something is not right but at first you have no basis for judgement. Using your test kits every so often and correlating those readings with physical appearances is the only way to become experienced.
Summary
 Slide 43
So, a quick summary of plant basics:
Slide 43
So, a quick summary of plant basics:
- The correct intensity and spectrum of lighting
- Dissolved carbon dioxide to satisfy the need for carbon
- Major nutrients such as nitrogen, phosphorus, potassium, sulfur and others
- Trace elements such as iron, boron, and others
- Strong water movement to bring nutrients to the plants and carry waste away
- Water circulation in the substrate to bring nutrients to the roots
 Slide 44
OK, so enough of the details already. Let's see some pretty pictures as proof that all this
works! All the following photos are from our tanks at various stages in their evolution.
We have tried a variety of equipment and will point out what works and what doesnĺt work.
Slide 44
OK, so enough of the details already. Let's see some pretty pictures as proof that all this
works! All the following photos are from our tanks at various stages in their evolution.
We have tried a variety of equipment and will point out what works and what doesnĺt work.
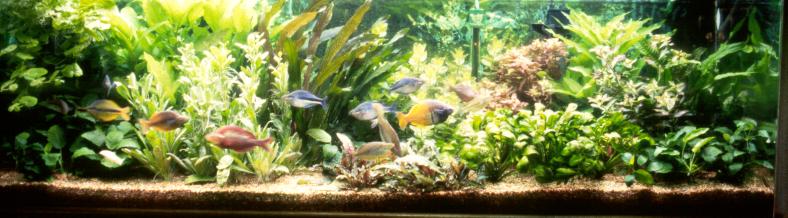
This first slide is an 85 gallon Rainbowfish tank. This tank has an undergravel filter (!) but it is run with power heads instead of airlift tubes. The turbulence caused by air bubbles will quickly defeat any efforts to inject CO2. Here we have only two Hagen 201 power heads for the entire 60" long tank to avoid too much water circulation in the gravel. A common myth is that you can't grow plants with an UGF - I hope this photo puts that rumor to rest. We have had some of the lushest stem plant growth in this tank.
One drawback to an UGF is the need for more maintenance. We find that we need to pull up the plants every six months or so and give the gravel a good vacuuming. The UGF pulls detritus into the substrate providing the needed negative binding sites like laterite, but too much a good thing is, well, too much!
 Slide 45
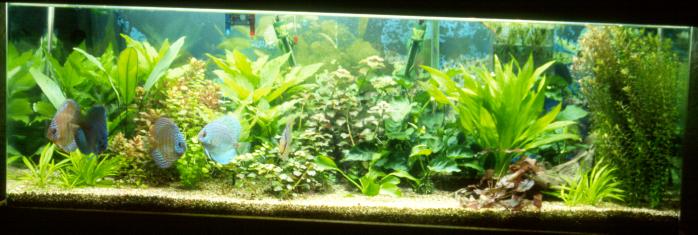
This is a 100 gallon discus tank that was setup with laterite but without the expensive
under gravel heating coils. It uses a trickle filter. Note the variety of plants growing
in the 84 F water. Some may take longer to acclimate to the higher temperature but very
few plants will not grow in warmer water.
Slide 45
This is a 100 gallon discus tank that was setup with laterite but without the expensive
under gravel heating coils. It uses a trickle filter. Note the variety of plants growing
in the 84 F water. Some may take longer to acclimate to the higher temperature but very
few plants will not grow in warmer water.
We found that the tank did very well without heating coils for at least 18 months but then we began to experience a slow down in plant growth and an upsurge in algae.
 Slide 46
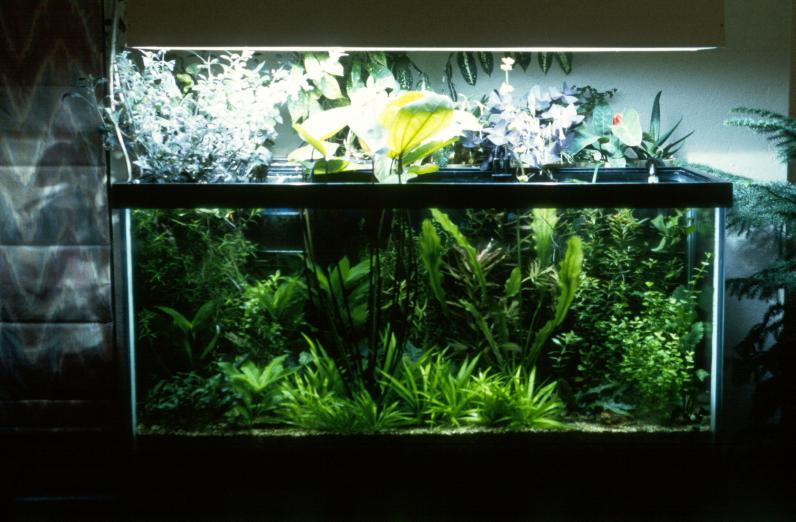
This is our 90 gallon open-top tank. It is much like the discus tank except it does have
substrate heating coils plus it uses a suspended metal halide hood instead of fluorescent
lights. With the heating coils, it has never experienced any instabilities, reduction in
plant growth or algae. It ran perfectly for 5 years before we had to tear to down when we
remodeled the house.
Slide 46
This is our 90 gallon open-top tank. It is much like the discus tank except it does have
substrate heating coils plus it uses a suspended metal halide hood instead of fluorescent
lights. With the heating coils, it has never experienced any instabilities, reduction in
plant growth or algae. It ran perfectly for 5 years before we had to tear to down when we
remodeled the house.
Notice the emersed plants. The busy plant to the left is Hygrophila corymbosa and the big plant in the middle is Echinodorus osiris. The open top really allows a spectacular display. There is a shelf behind the tank with houseplants on it that really benefit from the bright light.